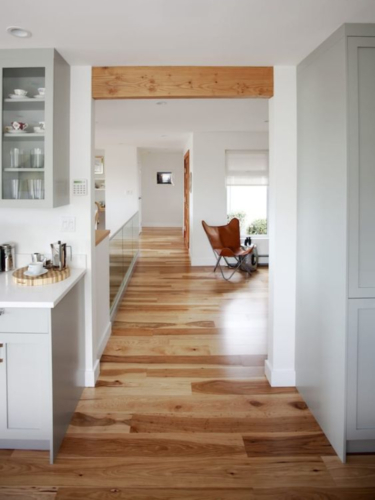
Hardwood floors are a timeless and elegant choice for any home, but over time, they can become worn, scratched, or faded. Refinishing your hardwood floors can breathe new life into your space and restore the natural beauty of the wood. While it may seem like a daunting task, refinishing hardwood floors is a manageable DIY project with the right guidance. In this comprehensive step-by-step guide, we’ll walk you through the process on how to refinish hardwood floors to help you achieve a stunning result.
Materials You’ll Need:
- Safety goggles, dust mask, and ear protection
- Sander: Drum sander or orbital sander (rentable from most hardware stores)
- Sandpaper: Various grits (typically 36, 60, 80, and 120 grit)
- Edge sander: For the areas the drum sander can’t reach
- Shop vacuum: To remove dust and debris
- Tack cloths: To wipe away residual dust
- Wood filler: For any cracks or gaps
- Stain or finish of your choice: Water or oil-based polyurethane, varnish, or wax
- Paintbrush or applicator: For applying the finish
- Paint trays and rollers: For larger areas
- Painter’s tape: To protect walls and baseboards
- Plastic sheeting or drop cloths: To protect adjacent rooms
- Knee pads: To protect your knees during the process
Step 1: Preparation
Remove all furniture, rugs, and any obstacles from the room to create a clear workspace. Ensure proper ventilation by opening windows and using fans. This will help disperse dust and fumes and keep the air fresh. Then, put on your safety goggles, dust mask, and ear protection. Safety is paramount during this project, and these items will protect you from potential hazards.
Step 2: Sanding
Begin sanding with the coarsest grit (around 36 grit) on the drum sander. Always move the sander in the direction of the wood grain. Sand the entire floor systematically to remove the old finish and imperfections.
Gradually work your way to finer grits (60, 80, and 120). Each pass will further smooth the wood surface and remove scratches. Keep the sander moving at a consistent pace to avoid creating gouges.
Use the edge sander to sand along the perimeter and any areas the drum sander couldn’t reach, such as corners and edges. Thoroughly vacuum the floor to remove dust and debris, then use tack cloths to wipe the surface clean. Ensure the surface is completely dust-free before proceeding.
Step 3: Repairs
Carefully examine the floor for cracks, gaps, or holes. Fill any imperfections with wood filler, following the product’s instructions. Allow it to dry completely. Once the filler is dry, use a fine-grit sandpaper to sand the repaired areas until they are smooth and level with the rest of the floor.
Step 4: Staining (Optional)
If you want to change the color of your hardwood floors, now is the time to apply a wood stain of your choice. Follow the manufacturer’s instructions for application and drying times.
Use a paintbrush or applicator to apply the stain evenly, working with the grain of the wood. Wipe off any excess stain with a clean cloth. Allow the stain to dry thoroughly before proceeding.
Step 5: Applying Finish
Choose a finish that suits your needs – water-based or oil-based polyurethane, varnish, or wax. Read and follow the manufacturer’s instructions for your chosen finish carefully.
Begin applying the finish along the edges of the room using a paintbrush or applicator. Be careful not to overlap onto the main floor area. For the main floor area, use a roller and tray to apply the finish evenly. Always work with the grain of the wood to ensure a smooth, uniform finish.
Apply multiple coats of finish as recommended by the manufacturer. Allow each coat to dry completely between applications, and lightly sand with fine-grit sandpaper before applying the next coat.
Step 6: Final Touches
Allow the final coat of finish to cure for the recommended time (usually 24-72 hours) before moving furniture back into the room. Be cautious about heavy traffic during this period.
To maintain the beauty of your newly refinished hardwood floors, place felt pads on the legs of furniture to prevent scratches, and use rugs or mats in high-traffic areas.
Keep your hardwood floors looking their best by sweeping or vacuuming regularly and cleaning up spills promptly. Periodically, you may need to reapply a maintenance coat of finish to keep them in top condition.
Refinishing your hardwood floors can be a rewarding DIY project that adds value and beauty to your home. While it requires time and effort, the results are well worth it. Follow this guide carefully, take your time, and enjoy the satisfaction of walking on freshly refinished hardwood floors for years to come. With proper care and maintenance, your hardwood floors will continue to shine and provide a stunning backdrop for your home’s interior.
About Us:
Founded in 2017, Satin and Slate is one of the elite interior design studios in Southern California. Located in Long Beach, this dedicated team of designers oversees from kitchen and bathroom renovations to commercial projects. Equipped with their own showroom/studio they can satisfy the needs of any client. Featuring clean lines, bright colors and fresh ideas Satin and Slate’s mission is to bring your vision to life and help transform your space into something extraordinary.


